Monday, May 15, 2017

install and Secure phpMyAdmin on Ubuntu 16.04

Install phpMyAdmin

The easiest way to install phpmyadmin is through apt-get:
sudo apt-get install phpmyadmin apache2-utils
During the installation, phpMyAdmin will walk you through a basic configuration. Once the process starts up, follow these steps:
  • Select Apache2 for the server
  • Choose YES when asked about whether to Configure the database for phpmyadmin with dbconfig-common
  • Enter your MySQL password when prompted
  • Enter the password that you want to use to log into phpmyadmin
After the installation has completed, add phpmyadmin to the apache configuration.
sudo nano /etc/apache2/apache2.conf
Add the phpmyadmin config to the file.
Include /etc/phpmyadmin/apache.conf
Restart apache:
sudo service apache2 restart
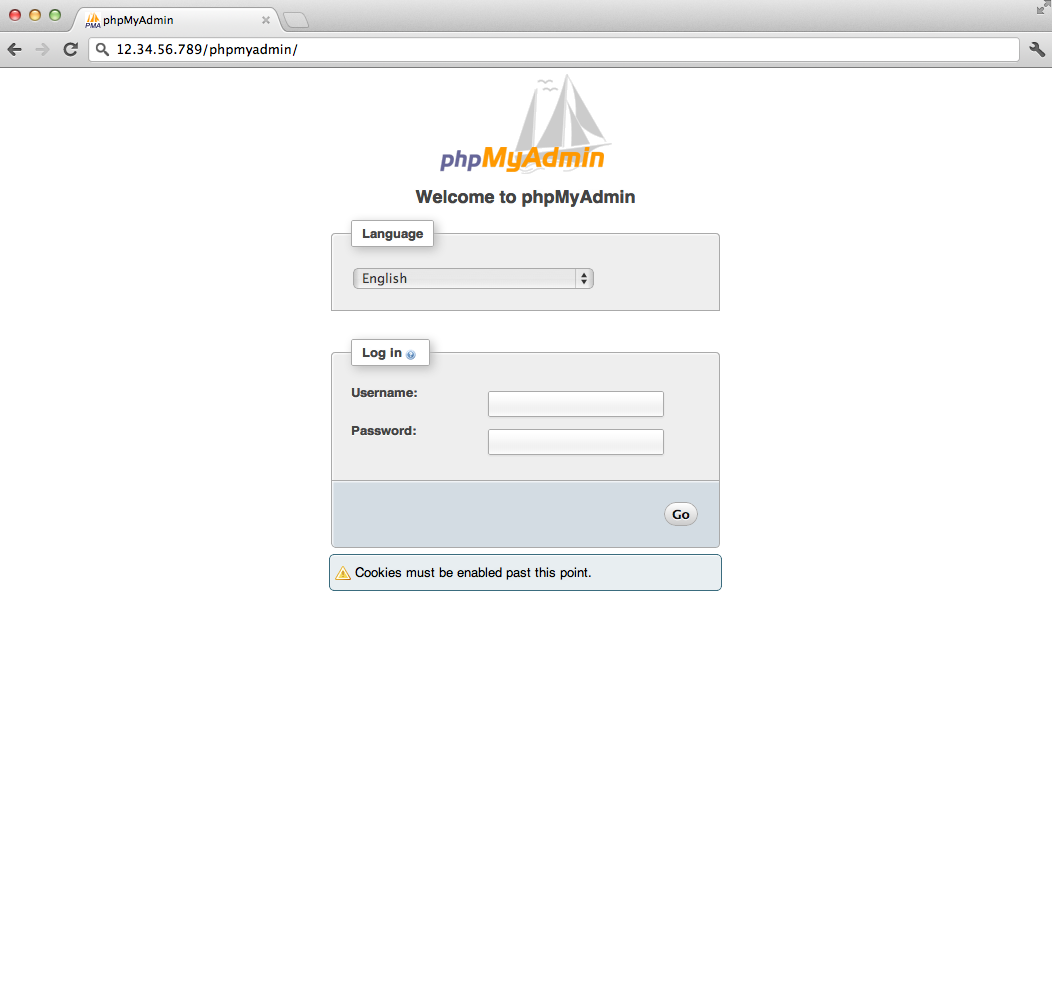
You can then access phpmyadmin by going to youripaddress/phpmyadmin. The screen should look like this

Security

Unfortunately older versions of phpMyAdmin have had serious security vulnerabilities including allowing remote users to eventually exploit root on the underlying virtual private server. One can prevent a majority of these attacks through a simple process: locking down the entire directory with Apache's native user/password restrictions which will prevent these remote users from even attempting to exploit older versions of phpMyAdmin.

Set Up the .htaccess File

To set this up start off by allowing the .htaccess file to work within the phpmyadmin directory. You can accomplish this in the phpmyadmin configuration file:
sudo nano /etc/phpmyadmin/apache.conf 
Under the directory section, add the line “AllowOverride All” under “Directory Index”, making the section look like this:
<Directory /usr/share/phpmyadmin>
        Options FollowSymLinks
        DirectoryIndex index.php
        AllowOverride All
        [...]

Configure the .htaccess file

With the .htaccess file allowed, we can proceed to set up a native user whose login would be required to even access the phpmyadmin login page.
Start by creating the .htaccess page in the phpmyadmin directory:
sudo nano /usr/share/phpmyadmin/.htaccess
Follow up by setting up the user authorization within .htaccess file. Copy and paste the following text in:
AuthType Basic
AuthName "Restricted Files"
AuthUserFile /etc/apache2/.phpmyadmin.htpasswd
Require valid-user
Below you’ll see a quick explanation of each line
  • AuthType: This refers to the type of authentication that will be used to the check the passwords. The passwords are checked via HTTP and the keyword Basic should not be changed.
  • AuthName: This is text that will be displayed at the password prompt. You can put anything here.
  • AuthUserFile: This line designates the server path to the password file (which we will create in the next step.)
  • Require valid-user: This line tells the .htaccess file that only users defined in the password file can access the phpMyAdmin login screen.

Create the htpasswd file

Now we will go ahead and create the valid user information.
Start by creating a htpasswd file. Use the htpasswd command, and place the file in a directory of your choice as long as it is not accessible from a browser. Although you can name the password file whatever you prefer, the convention is to name it .htpasswd.
sudo htpasswd -c /etc/apache2/.phpmyadmin.htpasswd username
A prompt will ask you to provide and confirm your password.
Once the username and passwords pair are saved you can see that the password is encrypted in the file.
FInish up by restarting apache:
sudo service apache2 restart

Saturday, May 2, 2015

Install Yii Framework Pada Linux Debian

Install Yii Framework Pada Linux Debian
Kebanyakan tutorial di luaran sana membingungkan ya. Ok lah kali ini mencoba dengan cara saya sendiri. Sebelumnya harus punya dulu php, phpmyadmin dan mysql. Kalau belum punya, ada artikel disini -link .
Memulai instalasi Yii
Pertama buka situs http://www.yiiframework.com/download/ , pada saat tulisan ini dibuat Yiinya versi 1.1.14. Click download
Selesai download , Itu kan namanya masih njlimet tuh, biar ga bingung rename aja yang sebelumnya masih yii-1.1.14.f0fee9.tar.gz ganti cobayii.tar.gz aja. Extract filenya kaalau mau pake terminal
tar xvzf cobayii.tar.gz
Copy ke folder /var/www, kalau kebetulan masih buka terminal
Saat ini saya lagi dalam folder downloads jadi perintahnya
cp -r cobayii /var/www/
Kemudian buat folder dalam /var/www misalnya folder itu bernama myii
mkdir  /var/www/coba
Lanjut jalankan perintah ini
php /var/www/cobayii/framework/yiic.php webapp /var/www/coba
nanti akan keluar ,
root@debian:~# php /var/www/cobayii/framework/yiic.php webapp /var/www/coba/
Create a Web application under ‘/var/www/coba’? (yes|no) [no]:
*kalau pilih yes nantinya begini, pilih y
mkdir /var/www/coba/assets

cara install Litespeed web server linux

cara install Litespeed web server linux

Persyaratan sistem minimum

  • Sistem Operasi:
    • Linux (i386): kernel 2.4 ke atas, glibc-2.2 dan up
    • FreeBSD (i386): 4,5 dan up
    • MacOSX: 10.3 dan up
    • Ubuntu: 8.04 dan up
    • Debian: 4 dan up
  • CPU:
    • Intel: 80486 dan up
    • Sun: UltraSPARC dan up
    • PowerPC: PowerPC G4
  • Memory: 32MB dan up
  • Disk:
    • Instalasi: 200MB
    • Runtime: 300MB dan up, bertukar ruang tergantung pada penggunaan.

Instalasi

Instalasi harus dilakukan di terminal command line. Untuk tujuan pengujian, LiteSpeed ​​Web Server dapat diinstal ke dalam direktori home oleh pengguna non-hak istimewa. Untuk penggunaan produksi, harus diinstal ke direktori sistem.
Dalam Mac OS X, user root dinonaktifkan secara default. Hal ini dapat diaktifkan dengan menggunakan serangkaian tindakan rinci di situs Apple. Anda juga dapat menggunakan perintah sudo untuk menginstal LSWS ke direktori system tanpa memungkinkan pengguna root, tapi folder sistem masih hanya akan dimanipulasi oleh user root. Ini berarti bahwa setiap kali Anda ingin mengontrol LSWS dari baris perintah terminal (seperti ketika Anda ingin memulai atau menghentikan LSWS), Anda harus menggunakan perintah sudo.

Instalasi Langkah-langkah:

  1. Download dan dekompresi paket ke sebuah lokasi yang nyaman:
    wget http://open.litespeedtech.com/packages/openlitespeed.1.0.1.tgz; tar zxf openlitespeed.1.0.1.tgz
  2. Pergi ke direktori instalasi, kompilasi, dan menginstal paket sebagai user root (untuk penggunaan produksi):
    cd openlitespeed
    ./configure (./configure --with-kelompok = nogroup untuk Ubuntu / Debian)
    make && make install 

    Catatan: Paket berikut perlu diinstal sebelum kompilasi dan instalasi OpenLiteSpeed: PCRE, expat, openssl, geoip, zlib.
     
    • sudo apt-get update
    • sudo apt-get install build-essential
    • sudo apt-get install libpcre3-dev libexpat1-dev libssl-dev libgeoip-dev zlib1g-dev
     Secara default, Installer akan menginstal sebuah situs sampel pada port 8088 dan mengatur konsol WebAdmin (yang LiteSpeed ​​GUI) ke port 7080. (user: admin password: 123456)

  3. Untuk informasi rinci tentang mengendalikan proses server, silakan lihat Panduan Administrasi.
    Untuk memulai server, jalankan [your_install_dir] / bin / lswsctrl mulai. (Untuk menghentikannya, menjalankan [your_install_dir] / bin / lswsctrl berhenti.)
     
  4. Sebuah situs sampel harus berjalan di server.
    Untuk mengakses situs Anda, arahkan browser Anda ke http: // [alamat]: 8088 /, [alamat] menjadi alamat IP atau nama domain mesin web server Anda. Gunakan "localhost" jika server pada mesin yang Anda gunakan. "8088" adalah port default. Jika Anda memilih port lain untuk LiteSpeed ​​selama instalasi, menggunakan port Anda ditunjuk.
    Halaman selamat terkait dengan halaman pengujian lain harus memuat ke browser ketika menunjuk ke alamat di atas. Jika tidak, coba uji antarmuka WebAdmin.
     
  5. Port default untuk konsol WebAdmin adalah 7080.
    Plug https: // [alamat]: 7080 /, ke browser Anda untuk pergi ke antarmuka WebAdmin. (Jika Anda mengubah port untuk WebAdmin selama instalasi, menggunakan port itu sebagai gantinya.)
    Ingat "https: //" dan bahwa untuk [alamat] Anda dapat menggunakan "localhost" jika Anda sedang menggunakan mesin server menyala.
    The WebAdmin halaman selamat datang harus beban. Klik "Log on" link dan menggunakan nama pengguna administrator dan password yang ditentukan selama instalasi untuk log on.
    Untuk informasi rinci mengenai konfigurasi, silakan lihat Panduan Konfigurasi kami, atau klik "Help" link di bagian atas setiap halaman.
     
  6. Jika server Anda menggunakan firewall, pastikan bahwa localhost dipercaya.
    Misalnya, Linux dengan IPTables harus mencakup aturan MENGIZINKAN INPUT dari LO.
     
  7. Jika situs web Anda dan antarmuka WebAdmin tidak dapat diakses, silakan lihat di error log [your_install_dir] /logs/error.log.
     
    Jika ada konflik TCP port dengan aplikasi server lain, server web harus diinstal ulang dengan port yang tersedia. Perintah berikut dapat digunakan untuk menemukan port yang tersedia: netstat | grep XXXX XXXX adalah nomor port. Jika port yang tersedia, perintah tidak akan menghasilkan output.
    Jika direktori swapping tidak dapat ditulis, Anda dapat memberikan izin tertulis untuk direktori swapping ke pengguna yang web server berjalan sebagai, atau mengubah konfigurasi direktori swapping secara manual. Direktori swapping dikonfigurasi dalam file konfigurasi XML server: [your_install_dir] /conf/httpd_config.xml. Cari file XML untuk swappingDir. Lokasi default untuk direktori swapping adalah / tmp / lshttpd / swap.
    Jika Anda masih mengalami masalah dengan instalasi, silahkan periksa wiki kami atau posting masalah Anda pada forum dukungan kami.

Catatan

  • OpenLiteSpeed ​​mendukung kedua file konfigurasi XML LiteSpeed ​​asli dan file konfigurasi teks biasa (bagi mereka yang digunakan untuk mengedit httpd.conf Apache). Jalankan [your_install_dir] /conf/switch_config.sh untuk beralih antara format ini.
  • Pada Debian dan, yang dikirim PHP (untuk CentOS) tidak akan berjalan. Anda akan perlu untuk membangun sebuah PHP baru untuk OpenLiteSpeed ​​untuk menjalankan aplikasi PHP dengan OpenLiteSpeed.

Wednesday, April 2, 2014

cara symlink folder ke localhost apache2 di Debian

cara symlink folder ke localhost apache2 di Debian
Cara menampilakan folder atau  file kita pada localhost di apache2 pada debian/linux
Karena ini sangat laah mudah dan gampang tp bikin kepala pusing untuk Newbie pada debian
untuk melakukan  bisa ada dua cara yang bisa di lakukan
yaitu dengan merubah dokumen root pada apache2 ketikan pada teminal linux dengan akses super user

# nano /etc/apache2/site-available/default

maka akan keluar tampilan berikut...


agar localhost apache2 selalu memmbaca file di folder kita
 cukup edit saja Dokumen root /var/www/ menjadi   Dokumen root /home/user/folder
 dan dibawahnya <Directory /var/www/> menjadi    <Diretory /home/user/folder>

  Tp cara itu tidak efektif dan fleksibel hanya menampilkan folder yang ada di direktori user  anda..
NB: user dan folder sesuaikan dengan user yang ada pada Lepi or Pc anda dimana letak file dan folder tersebut............

Untuk cara kedua menggunakan soflink dengan cara memberikan akses pada folder untuk di baca di localhost apache2

dengan cara ketikan perintah  berikut....


# ln -s /home/user/folder/ /var/www

Perintah tersebut memberikan akses localhost untuk membaca folder yang di dalam /home/user/folder
disini saia akan meberikann contoh agar phpmyadmin saia bisa dibaca oleh localhost dan bisa di tampilkan di browser sebagai index


Setelah itu di konfigurasi lakukan restart atau reload pada apache2

# /etc/init.d./apache2 reload


setelah itu chek pada browser kalian ketikan localhost pada addres bar browser.


oke sekian dlu semoga bermanfaat....