

Monday, May 15, 2017

TProxy single interface

biar gak hilang atau tertimbun oleh panjangnya post di facebook.
Khusus untuk webproxy bawaan IPFire (squid 3.x) atau addon squid-2.7STABLE9.
Non-aktifkan transparent di web interface -> Save & Restart
Edit file atau tambahkan file /etc/squid/squid.conf.pre.local, tambahkan baris berikut :
http_port 3129 transparent tproxy
[root@IPFire ~]# modprobe xt_TPROXY
[root@IPFire ~]# modprobe xt_socket
[root@IPFire ~]# modprobe nf_tproxy_core
[root@IPFire ~]# modprobe xt_mark
[root@IPFire ~]# modprobe nf_nat
[root@IPFire ~]# modprobe nf_conntrack_ipv4
[root@IPFire ~]# modprobe nf_conntrack
[root@IPFire ~]# modprobe nf_defrag_ipv4
[root@IPFire ~]# modprobe ipt_REDIRECT
Sesuaikan IP Address pada interface green. Sebagai contoh, saya pake 172.16.5.1
[root@IPFire ~]# iptables -t mangle -N DIVERT
[root@IPFire ~]# iptables -t mangle -A DIVERT -j MARK --set-mark 1
[root@IPFire ~]# iptables -t mangle -A DIVERT -j ACCEPT
[root@IPFire ~]# iptables -t mangle -A INPUT -j ACCEPT
[root@IPFire ~]# iptables -t mangle -A PREROUTING -p tcp -m socket -j DIVERT
[root@IPFire ~]# iptables -t mangle -A PREROUTING -d 172.16.5.1/32 -p tcp --dport 80 -j ACCEPT
[root@IPFire ~]# iptables -t mangle -A PREROUTING -d 172.16.5.1/32 -p tcp --dport 3128 -j ACCEPT
[root@IPFire ~]# iptables -t mangle -A PREROUTING ! -d 172.16.5.1/32 -p tcp --dport 80 -j TPROXY --tproxy-mark 0x1/0x1 --on-port 3129
[root@IPFire ~]# ip rule add fwmark 1 lookup 100
[root@IPFire ~]# ip route add local 0.0.0.0/0 dev lo table 100
[root@IPFire ~]# sysctl net.ipv4.ip_nonlocal_bind=1
[root@IPFire ~]# sysctl net.ipv4.ip_forward=1
Setting Mikrotik :
/ip firewall mangle
add action=mark-routing chain=prerouting disabled=no dst-port=80 \
in-interface=ether1-client new-routing-mark=proxy passthrough=no protocol=tcp
add action=mark-connection chain=prerouting disabled=no dst-port=80 \
in-interface=ether5-PROXY new-connection-mark=tproxy passthrough=yes protocol=\
tcp src-address=!172.16.5.1
add action=mark-routing chain=prerouting connection-mark=tproxy disabled=no \
in-interface=!ether5-proxy new-routing-mark=proxy passthrough=no
tulisan ini dicomot dari tempat sampah mas Syaifuddin.

akses situs dengan batasan waktu di mikrotik
penjadwalkan kapan situs tersebut bisa diakses dan kapan situs tersebut bisa diblokir. Misalkan studi kasus di sebuah sekolah pada jam 07.00 - 14.00 dilarang membuka facebook tapi pada jam 14.00 keatas boleh. Bagaimana caranya ? kita akan mengkombinasikan layer 7 dengan time pada mikrotik. Pastikan SNTP mikrotik anda sudah sesuai denga waktu setempat. Tidak hanya facebook saja sih, nanti bisa anda kembangkan sendiri.
Langkah langkah :
1. Masuklah ke Winbox anda.
2. Klik IP > Firewall.


install and Secure phpMyAdmin on Ubuntu 16.04
Install phpMyAdmin
The easiest way to install phpmyadmin is through apt-get:sudo apt-get install phpmyadmin apache2-utilsDuring the installation, phpMyAdmin will walk you through a basic configuration. Once the process starts up, follow these steps:
- Select Apache2 for the server
- Choose YES when asked about whether to Configure the database for phpmyadmin with dbconfig-common
- Enter your MySQL password when prompted
- Enter the password that you want to use to log into phpmyadmin
sudo nano /etc/apache2/apache2.confAdd the phpmyadmin config to the file.
Include /etc/phpmyadmin/apache.confRestart apache:
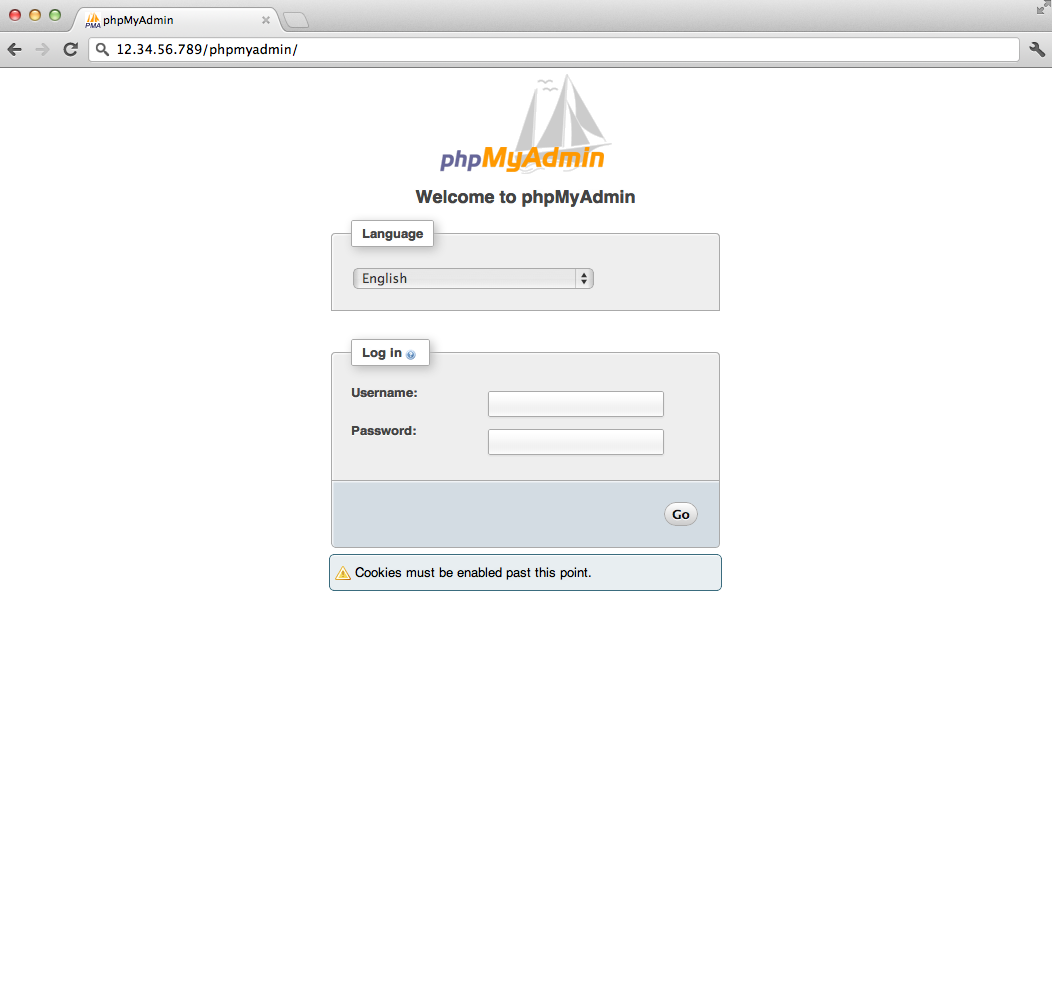
sudo service apache2 restartYou can then access phpmyadmin by going to youripaddress/phpmyadmin. The screen should look like this
Security
Unfortunately older versions of phpMyAdmin have had serious security vulnerabilities including allowing remote users to eventually exploit root on the underlying virtual private server. One can prevent a majority of these attacks through a simple process: locking down the entire directory with Apache's native user/password restrictions which will prevent these remote users from even attempting to exploit older versions of phpMyAdmin.Set Up the .htaccess File
To set this up start off by allowing the .htaccess file to work within the phpmyadmin directory. You can accomplish this in the phpmyadmin configuration file:sudo nano /etc/phpmyadmin/apache.confUnder the directory section, add the line “AllowOverride All” under “Directory Index”, making the section look like this:
<Directory /usr/share/phpmyadmin>
        Options FollowSymLinks
        DirectoryIndex index.php
        AllowOverride All
        [...]
Configure the .htaccess file
With the .htaccess file allowed, we can proceed to set up a native user whose login would be required to even access the phpmyadmin login page.Start by creating the .htaccess page in the phpmyadmin directory:
sudo nano /usr/share/phpmyadmin/.htaccessFollow up by setting up the user authorization within .htaccess file. Copy and paste the following text in:
AuthType Basic
AuthName "Restricted Files"
AuthUserFile /etc/apache2/.phpmyadmin.htpasswd
Require valid-user
Below you’ll see a quick explanation of each line
- AuthType: This refers to the type of authentication that will be used to the check the passwords. The passwords are checked via HTTP and the keyword Basic should not be changed.
- AuthName: This is text that will be displayed at the password prompt. You can put anything here.
- AuthUserFile: This line designates the server path to the password file (which we will create in the next step.)
- Require valid-user: This line tells the .htaccess file that only users defined in the password file can access the phpMyAdmin login screen.
Create the htpasswd file
Now we will go ahead and create the valid user information.Start by creating a htpasswd file. Use the htpasswd command, and place the file in a directory of your choice as long as it is not accessible from a browser. Although you can name the password file whatever you prefer, the convention is to name it .htpasswd.
sudo htpasswd -c /etc/apache2/.phpmyadmin.htpasswd usernameA prompt will ask you to provide and confirm your password.
Once the username and passwords pair are saved you can see that the password is encrypted in the file.
FInish up by restarting apache:
sudo service apache2 restart
Bypass atau deny cache situs atau ip di proxy squid
cara 1 :
acl bypass_ip dst 192.168.0.0/24 192.168.1.0/24
cache deny bypass_ip
always_direct allow bypass_ip
acl bypass_situs dstdomain .hotmail.com .youtube.com
cache deny bypass_situs
always_direct allow bypass_situs
Cara 2 :
acl bypass_situs dstdomain "/etc/squid/bypass.txt"
no_cache deny bypass_situs
always_direct allow bypass_situs
buat file bypass.txt :
touch /etc/squid/bypass.txt
nano /etc/squid/bypass.txt
masukan situs yg ingin di bypass atau deny cache
youtube.com
facebook.com
yahoo.com
squid3 -k rec
Bypass Ext :
hierarchy_stoplist cgi-bin ?
acl QUERY urlpath_regex cgi-bin \? \.flv \.exe
no_cache deny QUERY
Mengenal ACL yang paling umum digunakan squid proxy server
Terjemahan TAG: acl di squid.conf
Mari kita mulai dengan membaca tipe-tipe acl yang didefinisikan di squid.conf. Jika Anda kesulitan memahami karena kendala bahasa, saya coba terjemahkan blok acl tadi di bawah ini.
Bagaimana? cukup banyak kan aclnya. Pusing? ya wajar lah hehe
Dari sekian banyak tipe acl yang bisa digunakan, menurut pengalaman saya hanya beberapa saja yang umum digunakan. Tentunya memang semua itu tergantung kebutuhannya. Walau tidak umum digunakan, tapi kalau memerlkukannya, mungkin saja digunakan dan sebaliknya.
Biasanya yang paling umum diguanakan adalah,
src, dst, dstdomain, port. ACL lainnya yang mungkin sering ditemui adalah url_regex, proxy_auth, maxconn, max_user_ip, time.
Untuk lebih memahami cara penggunaan acl ini, saya akan coba berikan beberapa contoh penggunaan acl.
Membatasi akses internet dari IP tertentu
Misal, dalam satu jaringan kantor, semua diperbolehkan mengakses internet via proxy. Kecuali beberapa komputer di meja penerima tamu atau front office.
Sekalian untuk format penulisan acl di atas, Anda bisa juga menuliskannya seperti di bawah ini.
Format inline, jadi IP dituliskan ke samping, tanpa menekan enter atau penanda baris baru.
Format rentang, karena kebetulan IP si komputer front office berurutan.
Silakan dilihat lagi di blok ACL yang sudah saya terjemahkan di atas.
Membatasi akses ke situs tertentu
Anda ingin memblock beberapa situs porno yang paling sering dikunjungi oleh user Anda. Tentu saja ini cara paling sederhana, dan mungkin tidak cocok untuk memblock situs porno secara keseluruhan. Tapi ini hanya sekedar contoh saja.
Pertama, pastikan rules untuk membatasi akses ke situs porno itu muncul lebih dahulu, dibandingkan rules lain yang membolehkan akses internet. Lihat contoh dibawah ini. Kita akan menggunakan tipeacl dstdomain, yang bisa digunakan untuk menandai domain tujuan yang akan diakses.
Contoh penempatan yang salah ada di bawah ini
Jadi perlu Anda ingat, posisi menentukan prestasi. Atau posisi rules yang Anda buat di squid.conf sangat menentukan apakah rules tersebut akan digunakan atau tidak.
Membatasi akses internet di jam kerja
Kali ini kita akan menggunakan tipe acl
time. Langsung saja ke contoh.
Lihat tanda seru (!) di depan acl. Yang berarti tanda negasi, atau NOT (bukan). Jadi artinya kita hanya membuka akses internet untuk jaringan_kantor dan waktunya bukan di jam kerja.
Membatasi akses internet di jam kerja, kecuali manager dan bos
Contoh lain, kantor hanya ingin membuka akses internet untuk komputer-komputer manajer dan si Boss besar. Karyawan lainnya, bisa mengakses internet tapi hanya di luar waktu kerja.
Install Apache and Allow in Firewall
Step 1: Install Apache and Allow in Firewall

We can install Apache easily using Ubuntu's package manager,
apt.
A package manager allows us to install most software pain-free from a
repository maintained by Ubuntu. You can learn more about how to use apt here.For our purposes, we can get started by typing these commands:
- sudo apt-get update
- sudo apt-get install apache2
sudo command, these operations get
executed with root privileges. It will ask you for your regular user's
password to verify your intentions.Once you've entered your password,
apt will tell you which packages it plans to install and how much extra disk space they'll take up. Press Y and hit Enter to continue, and the installation will proceed.Set Global ServerName to Suppress Syntax Warnings
Next, we will add a single line to the/etc/apache2/apache2.conf file to suppress a warning message. While harmless, if you do not set ServerName globally, you will receive the following warning when checking your Apache configuration for syntax errors:
- sudo apache2ctl configtest
Output
AH00558: apache2: Could not reliably determine the server's fully qualified domain name, using 127.0.1.1. Set the 'ServerName' directive globally to suppress this message
Syntax OK
- sudo nano /etc/apache2/apache2.conf
ServerName
directive, pointing to your primary domain name. If you do not have a
domain name associated with your server, you can use your server's
public IP address:
Note
If you don't know your server's IP address, skip down to the section on how to find your server's public IP address to find it.
/etc/apache2/apache2.conf
. . .
ServerName server_domain_or_IP
Next, check for syntax errors by typing:
- sudo apache2ctl configtest
ServerName directive, all you should see is:
Output
Syntax OK
- sudo systemctl restart apache2
Adjust the Firewall to Allow Web Traffic
Next, assuming that you have followed the initial server setup instructions to enable the UFW firewall, make sure that your firewall allows HTTP and HTTPS traffic. You can make sure that UFW has an application profile for Apache like so:
- sudo ufw app list
Output
Available applications:
  Apache
  Apache Full
  Apache Secure
  OpenSSH
Apache Full profile, it should show that it enables traffic to ports 80 and 443:
- sudo ufw app info "Apache Full"
Output
Profile: Apache Full
Title: Web Server (HTTP,HTTPS)
Description: Apache v2 is the next generation of the omnipresent Apache web
server.

Ports:
  80,443/tcp
- sudo ufw allow in "Apache Full"
http://your_server_IP_address
Reverse Proxy dengan Apache HTTP server
Reverse Proxy dengan Apache HTTP server

menjalankan beberapa aplikasi berbasis web yang berbeda serta berjalan pada paltform system yang
juga berbeda namun tuntutan kebutuhan perusahaan mengharuskan aplikasi-aplikasi web tersebut
dapat diakses dari jaringan public (internet) tanpa harus merubah kode sumber dari aplikasi web
dan konfigurasi web server tersebut. Cara untuk menyelesaikan masalah tersebut adalah dengan
meminta(menyewa) kepada ISP agar disediakan beberapa blok IP public sejumlah atau sebanyak
yang dapat diberikan kepada masing-masing mesin web server tersebut, kemudian memetakan
nama masing-masing mesin web server tersebut dengan beberapa IP public yang telah disediakan
ISP pada dns server pengelola domain perusahaan Anda. Namun bagaimana dengan kasus yang lain
yaitu Anda tidak memiliki atau dengan kata lain ISP tidak dapat menyediakan IP public yang sesuai
dengan jumlah mesin web server tersebut, misalnya ISP hanya dapat menyediakan 2 buah IP public
yang dapat digunakan sedangkan mesin web server berjumlah tiga buah dan belum lagi mesin
email server juga memerlukan IP public. Hmm...apa benar-benar ada kondisi atau permasalahan
seperti ini ? Ya mungkin saja, karena permasalahan tersebut memang ada solusinya sebab tidak
akan ada suatu persoalan jika tidak ada penyelesaiannya :) . Permasalahan tersebut dapat
diselesaikan dengan cara menerapkan http reverse proxy. Nah..untuk itu pada artikel kali ini
penulis akan menjelaskan bagaimana menerapkan reverse proxy dengan pendekatan kasus yang
telah diungkapkan tadi.
Pada artikel ini penulis menerapkan reverse proxy di Apache HTTP server versi 2 bawaan distro
linux CentOS 5.2.
I. HTTP Proxy
Sebelum kita melangkah pada penerapan http reverse proxy, penulis akan menjelaskan sedikit
tentang apa itu HTTP proxy. HTTP proxy atau web proxy secara sederhana adalah sebuah gateway
yang menjadi perantara user dengan web-web server yang sebenarnya (web-web server di Internet).
Umumnya http proxy dikenal menjadi dua jenis http proxy yaitu forward proxy dan reverse proxy,
namun forward proxy sering disingkat penyebutannya dengan http proxy atau web proxy saja.
I.1. Forward Proxy
Forward proxy adalah http proxy yang menjadi perantara user-user pada local area network dengan
web-web server yang terdapat pada internet, penerapan forward proxy umumnya disertai
mekanisme web cache untuk mengefisienkan bandwidth dan meningkatkan akselerasi akses web,
pada prakteknya jenis http proxy inilah yang umum digunakan atau diterapkan. Software yang
umumnya digunakan untuk keperluan forward proxy yaitu squid http proxy server.
I.2.Reverse Proxy
Reverse proxy memiliki maksud yang berkebalikan dengan forward proxy yaitu menjadi perantara
user-user di internet terhadap akses ke web-web server yang berada pada local area network,
sehingga seolah-olah user di internet mengakses langsung web server yang dimaksud padahal
sesungguhnya user di internet mengakses web-web server yang terdapat di local area network
melalui reverse proxy tersebut. Tentunya komputer yang bertindak sebagai reverse proxy tersebut
memiliki IP public yang static sehingga dapat diakses dari internet. Software yang umumnya
digunakan untuk keperluan reverse proxy yaitu apache http server dengan mod_proxy nya.
II. Skenario
Untuk mempermudah pemahaman Anda tentang bagaimana penerapan reverse proxy di apache http
server, penulis membuat skenario sebagai berikut:
● Anda memiliki 2 buah IP public yang masing-masing diberikan ke modem/router ADSL
(misalnya ip=202.202.202.153/30) dan ke eth0 dari komputer bakal reverse
proxy(ip=202.202.202.154/30), lihat Gambar-1
● Komputer yang berfungsi sebagai reverse proxy juga berfungsi sebagai internet shraing bagi
komputer lainnya dalam LAN
● Local area network Anda memiliki network address 192.168.1.0/24
● IP address local dari komputer reverse proxy adalah 192.168.1.1
● Jumlah web server local adalah tiga buah yang masing-masing menjalankan aplikasi web
untuk marketing (ip=192.168.1.2) , hrd (ip=192.168.1.3), dan finance(192.168.1.4).
● Untuk mengakses aplikasi web marketing dari internet menggunakan alamat url
http://marketing.example.com
● Untuk mengakses aplikasi web hrd dari internet menggunakan alamat url
http://hrd.example.com
● Untuk mengakses aplikasi web hrd dari internet menggunakan alamat url
http://finance.example.com
● Penerapan reverse proxy tidak disertai dukngan web cache
● Diasumsikan Anda telah mendaftarkan pada DNS server pengelola domain example.com,
untuk nama host marketing.example.com, dan hrd.example.com serta finance.example.com
dipetakan ke ip 202.202.202.154 (yaitu IP public dari komputer reverse proxy)
● Pada komputer reverse proxy default gateway diset ke ip 202.202.202.153, dan pada
komputer-komputer di local area network default gateway diset ke ip 192.168.1.1
Gambar-1. Diagram jaringan reverse proxy
III. Konfigurasi Gateway
Langkah konfigurasi berikut ini bertujuan memungkinkannya traffic dari komputer-komputer pada
LAN dapat diteruskan ke internet. Lakukan perintah-perintah berikut ini untuk membuat
gateway/internet sharing (diasumsikan kebijakan default firewall tidak memblok koneksi apapun):
Pertama mengaktifkan IP Forward sbb:
# echo 1 > /proc/sys/net/ipv4/ip_forward
# echo echo 1 > /proc/sys/net/ipv4/ip_forward >> /etc/rc.local
atau Edit file /etc/sysctl.conf, dan set parameter net.ipv4.ip_forward=1
Kedua mengaktifkan IP Masquerade sbb:
# service iptables stop
# iptables -t nat -A POSTROUTING -s 192.168.1.0/24 -o eth0 -j MASQUERADE
# service iptables save
# chkconfig iptables on
IV. Konfigurasi reverse proxy apache http server
Dengan asumsi apache http server sudah terinstal, langkah berikutnya yang Anda lakukan adalah
konfigurasi apache sebagai reverse proxy. Tetapi perlu diperhatikan sebelumnya bahwa apache
membutuhkan mod_proxy. Untuk memastikan apakah sudah ada mod_proxy atau belum serta
apakah sudah dimuat oleh apache saat runtime, lakukan langkah berikut ini:
# ls /etc/httpd/modules/ |grep mod_proxy.so
Jika perintah tersebut menghasilkan output “mod_proxy.so”, maka modul mod_proxy sudah ada.
# grep mod_proxy.so /etc/httpd/conf/httpd.conf
Jika perintah tersebut menghasilkan output “LoadModule proxy_module modules/mod_proxy.so”,
maka mod_proxy sudah running.
Selanjutnya agar sesuai dengan skenario reverse proxy yang telah ditentukan maka tambahkan
baris-baris berikut ini pada bagian akhir dari file konfigurasi /etc/httpd/conf/httpd.conf.
NameVirtualHost 202.202.202.154
<VirtualHost 202.202.202.154:80>
ServerName marketing.example.com
ProxyRequests Off
ProxyPreserveHost On
ProxyPass / http://192.168.1.2/
ProxyPassReverse / http://192.168.1.2/
<Proxy *>
Order deny,allow
Allow from all
</Proxy>
</VirtualHost>
<VirtualHost 202.202.202.154:80>
ServerName hrd.example.com
ProxyRequests Off
ProxyPreserveHost On
ProxyPass / http://192.168.1.3/
ProxyPassReverse / http://192.168.1.3/
<Proxy *>
Order deny,allow
Allow from all
</Proxy>
</VirtualHost>
<VirtualHost 202.202.202.154:80>
ServerName finance.example.com
ProxyRequests Off
ProxyPreserveHost On
ProxyPass / http://192.168.1.4/
ProxyPassReverse / http://192.168.1.4/
<Proxy *>
Order deny,allow
Allow from all
</Proxy>
</VirtualHost>
Setelah mengeit dan menyimpan file konfigurasi apache, restart service apache httpd seperti berikut
# service httpd restart
Selanjutnya agar service httpd diaktifkan saat boot lakukan perintah berikut:
# chkconfig httpd on
Sekarang reverse proxy sudah selesai Anda setup.
pengertian Firewall

Apa itu Firewall?
Firewall adalah perangkat yang berfungsi untuk memeriksa dan menentukan paket data yang dapat keluar atau masuk dari sebuah jaringan. Dengan kemampuan tersebut maka firewall berperan dalam melindungi jaringan dari serangan yang berasal dari jaringan luar (outside network). Firewall mengimplementasikan packet filtering dan dengan demikian menyediakan fungsi keamanan yang digunakan untuk mengelola aliran data ke, dari dan melalui router. Sebagai contoh, firewall difungsikan untuk melindungi jaringan lokal (LAN) dari kemungkinan serangan yang datang dari Internet. Selain untuk melindungi jaringan, firewall juga difungsikan untuk melindungi komputer user atau host (host firewall).
MikroTik RouterOS memiliki implementasi firewall yang sangat kuat dengan fitur termasuk:
- stateful packet inspection
- Layer-7 protocol detection
- peer-to-peer protocols filtering
- traffic classification by:
- source MAC address
- IP addresses (network or list) and address types (broadcast, local, multicast, unicast)
- port or port range
- IP protocols
- protocol options (ICMP type and code fields, TCP flags, IP options and MSS)
- interface the packet arrived from or left through
- internal flow and connection marks
- DSCP byte
- packet content
- rate at which packets arrive and sequence numbers
- packet size
- packet arrival time
- dll
Bridge adalah suatu alat yang dapat menghubungkan jaringan komputer LAN (Local arean Network) dengan jaringan LAN yang lain. Bridge dapat menghubungkan tipe jaringan komputer berbeda-beda (misalnya seperti Ethernet & Fast Ethernet), ataupun tipe jaringan yang serupa atau sama.Mode bridge memungkinkan network yang satu tergabung dengan network di sisi satunya secara transparan, tanpa perlu melalui routing, sehingga mesin yang ada di network yang satu bisa memiliki IP Address yang berada dalam 1 subnet yang sama dengan sisi lainnya.
Static routing adalah pembuatan dan peng-update-an routing table secara manual. Staric routing tidak akan merubah informasi yang ada pada table routing secara otomatis, sehingga administrator harus melakukan merubah secara manual apabila topologi jaringan berubah
6. Quality of Service (simple)
QoS mengacu kepada kemampuan memberikan pelayanan berbeda kepada lalulintas jaringan dengan kelas-kelas yang berbeda. Tujuan akhir dari QoS adalah memberikan network service yang lebih baik dan terencana dengan dedicated bandwith, jitter dan latency yang terkontrol dan meningkatkan loss karakteristik. QoS adalah kemampuan dalam menjamin pengiriman arus data penting atau dengan kata lain kumpulan dari berbagai kriteria performansi yang menentukan tingkat kepuasan penggunaan suatu layanan.
7. Wireless Concept
8. Wireless Interface : PTP & PTMP
9. Praktikum jaringan dasar


