Monday, May 15, 2017

TProxy single interface

biar gak hilang atau tertimbun oleh panjangnya post di facebook.
Khusus untuk webproxy bawaan IPFire (squid 3.x) atau addon squid-2.7STABLE9.
Non-aktifkan transparent di web interface -> Save & Restart
Edit file atau tambahkan file /etc/squid/squid.conf.pre.local, tambahkan baris berikut :
http_port 3129 transparent tproxy
[root@IPFire ~]# modprobe xt_TPROXY
[root@IPFire ~]# modprobe xt_socket
[root@IPFire ~]# modprobe nf_tproxy_core
[root@IPFire ~]# modprobe xt_mark
[root@IPFire ~]# modprobe nf_nat
[root@IPFire ~]# modprobe nf_conntrack_ipv4
[root@IPFire ~]# modprobe nf_conntrack
[root@IPFire ~]# modprobe nf_defrag_ipv4
[root@IPFire ~]# modprobe ipt_REDIRECT
Sesuaikan IP Address pada interface green. Sebagai contoh, saya pake 172.16.5.1
[root@IPFire ~]# iptables -t mangle -N DIVERT
[root@IPFire ~]# iptables -t mangle -A DIVERT -j MARK --set-mark 1
[root@IPFire ~]# iptables -t mangle -A DIVERT -j ACCEPT
[root@IPFire ~]# iptables -t mangle -A INPUT -j ACCEPT
[root@IPFire ~]# iptables -t mangle -A PREROUTING -p tcp -m socket -j DIVERT
[root@IPFire ~]# iptables -t mangle -A PREROUTING -d 172.16.5.1/32 -p tcp --dport 80 -j ACCEPT
[root@IPFire ~]# iptables -t mangle -A PREROUTING -d 172.16.5.1/32 -p tcp --dport 3128 -j ACCEPT
[root@IPFire ~]# iptables -t mangle -A PREROUTING ! -d 172.16.5.1/32 -p tcp --dport 80 -j TPROXY --tproxy-mark 0x1/0x1 --on-port 3129
[root@IPFire ~]# ip rule add fwmark 1 lookup 100
[root@IPFire ~]# ip route add local 0.0.0.0/0 dev lo table 100
[root@IPFire ~]# sysctl net.ipv4.ip_nonlocal_bind=1
[root@IPFire ~]# sysctl net.ipv4.ip_forward=1
Setting Mikrotik :
/ip firewall mangle
add action=mark-routing chain=prerouting disabled=no dst-port=80 \
in-interface=ether1-client new-routing-mark=proxy passthrough=no protocol=tcp
add action=mark-connection chain=prerouting disabled=no dst-port=80 \
in-interface=ether5-PROXY new-connection-mark=tproxy passthrough=yes protocol=\
tcp src-address=!172.16.5.1
add action=mark-routing chain=prerouting connection-mark=tproxy disabled=no \
in-interface=!ether5-proxy new-routing-mark=proxy passthrough=no
tulisan ini dicomot dari tempat sampah mas Syaifuddin.

akses situs dengan batasan waktu di mikrotik
penjadwalkan kapan situs tersebut bisa diakses dan kapan situs tersebut bisa diblokir. Misalkan studi kasus di sebuah sekolah pada jam 07.00 - 14.00 dilarang membuka facebook tapi pada jam 14.00 keatas boleh. Bagaimana caranya ? kita akan mengkombinasikan layer 7 dengan time pada mikrotik. Pastikan SNTP mikrotik anda sudah sesuai denga waktu setempat. Tidak hanya facebook saja sih, nanti bisa anda kembangkan sendiri.
Langkah langkah :
1. Masuklah ke Winbox anda.
2. Klik IP > Firewall.


install and Secure phpMyAdmin on Ubuntu 16.04

Install phpMyAdmin
The easiest way to install phpmyadmin is through apt-get:sudo apt-get install phpmyadmin apache2-utilsDuring the installation, phpMyAdmin will walk you through a basic configuration. Once the process starts up, follow these steps:
- Select Apache2 for the server
- Choose YES when asked about whether to Configure the database for phpmyadmin with dbconfig-common
- Enter your MySQL password when prompted
- Enter the password that you want to use to log into phpmyadmin
sudo nano /etc/apache2/apache2.confAdd the phpmyadmin config to the file.
Include /etc/phpmyadmin/apache.confRestart apache:
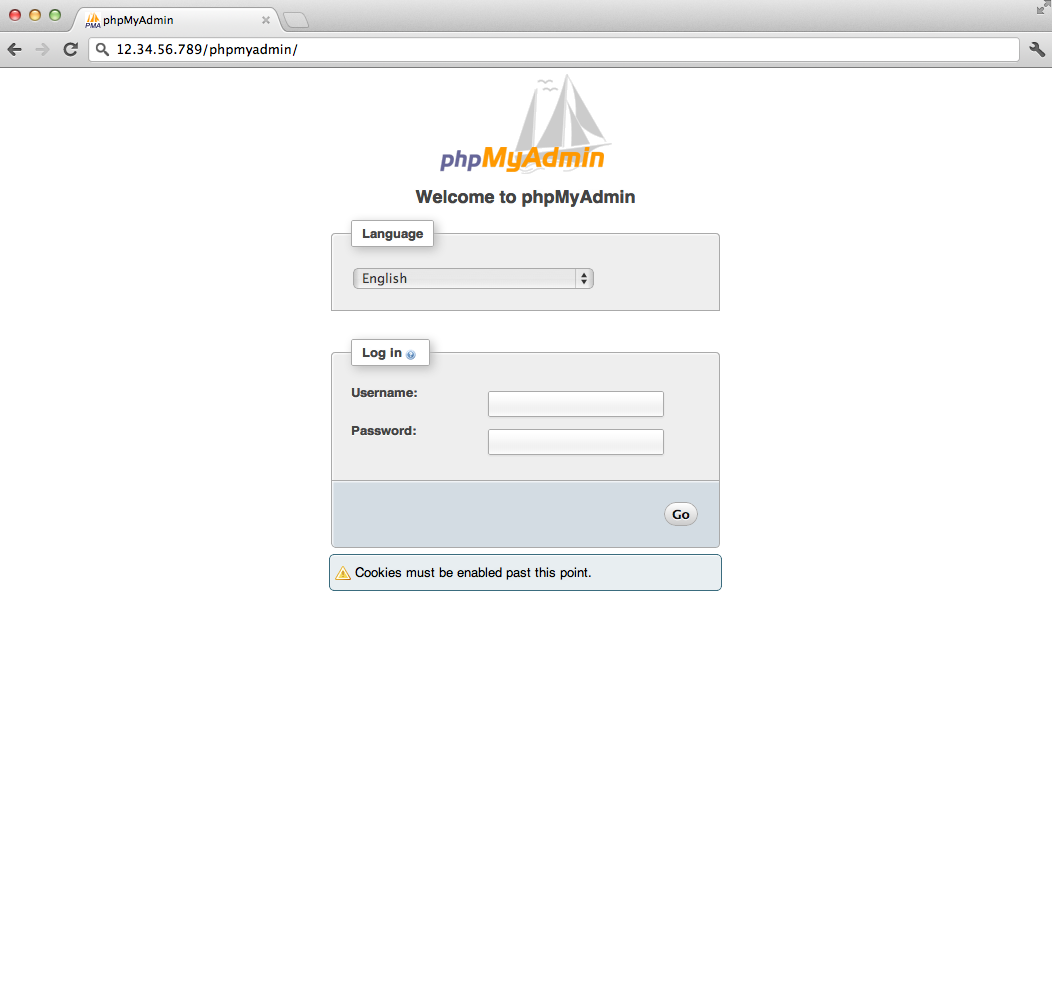
sudo service apache2 restartYou can then access phpmyadmin by going to youripaddress/phpmyadmin. The screen should look like this
Security
Unfortunately older versions of phpMyAdmin have had serious security vulnerabilities including allowing remote users to eventually exploit root on the underlying virtual private server. One can prevent a majority of these attacks through a simple process: locking down the entire directory with Apache's native user/password restrictions which will prevent these remote users from even attempting to exploit older versions of phpMyAdmin.Set Up the .htaccess File
To set this up start off by allowing the .htaccess file to work within the phpmyadmin directory. You can accomplish this in the phpmyadmin configuration file:sudo nano /etc/phpmyadmin/apache.confUnder the directory section, add the line “AllowOverride All” under “Directory Index”, making the section look like this:
<Directory /usr/share/phpmyadmin>
        Options FollowSymLinks
        DirectoryIndex index.php
        AllowOverride All
        [...]
Configure the .htaccess file
With the .htaccess file allowed, we can proceed to set up a native user whose login would be required to even access the phpmyadmin login page.Start by creating the .htaccess page in the phpmyadmin directory:
sudo nano /usr/share/phpmyadmin/.htaccessFollow up by setting up the user authorization within .htaccess file. Copy and paste the following text in:
AuthType Basic
AuthName "Restricted Files"
AuthUserFile /etc/apache2/.phpmyadmin.htpasswd
Require valid-user
Below you’ll see a quick explanation of each line
- AuthType: This refers to the type of authentication that will be used to the check the passwords. The passwords are checked via HTTP and the keyword Basic should not be changed.
- AuthName: This is text that will be displayed at the password prompt. You can put anything here.
- AuthUserFile: This line designates the server path to the password file (which we will create in the next step.)
- Require valid-user: This line tells the .htaccess file that only users defined in the password file can access the phpMyAdmin login screen.
Create the htpasswd file
Now we will go ahead and create the valid user information.Start by creating a htpasswd file. Use the htpasswd command, and place the file in a directory of your choice as long as it is not accessible from a browser. Although you can name the password file whatever you prefer, the convention is to name it .htpasswd.
sudo htpasswd -c /etc/apache2/.phpmyadmin.htpasswd usernameA prompt will ask you to provide and confirm your password.
Once the username and passwords pair are saved you can see that the password is encrypted in the file.
FInish up by restarting apache:
sudo service apache2 restart